Introducing Clipboard in Flow Designer and three new user experience updates
I’m very excited to announce that the Flow designer now allows you to copy and paste actions!
This has been one of the most desired features which our users have been asking for and it is finally here.
In this post, I will share how to use the Clipboard, along with some tips and tricks so that you can cut the amount of time it takes for you to build flows.
In the Flow designer – you will notice we have added a new tab called “My clipboard” – this is where all the actions you copy will be stored.
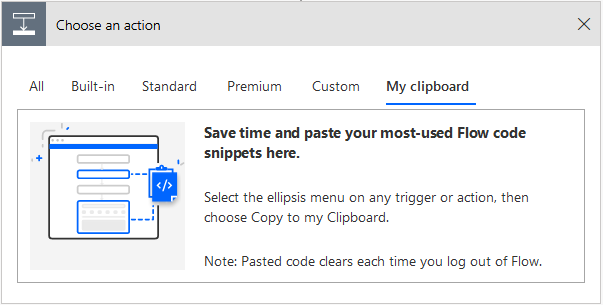
To add any action to the clipboard – click on the “…” icon and select “Copy to my clipboard” option

To paste / re-use the action – simply add the action, as you would add any other action, by selecting the “My clipboard” tab and selecting the copied action
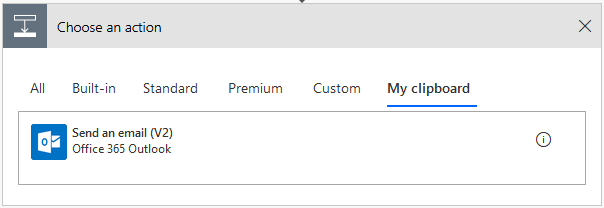
You can also paste / re-use actions across flows! This feature does not, I repeat does NOT, limit you to using the copied actions in one flow.
Additional tips and tricks
1. Use “Scope” to copy multiple actions at a time
If you want to copy multiple actions in one go – use “Scope”. You can do this by adding a “Scope” step to your flow, then drag and drop the actions you’d like to copy into the Scope step. Finally add the “Scope” to the clipboard.
2. Peek code using info bubble
If you’re an advanced user and would like to view the “code” of your copied action – hover on the “info” bubble and you can see what’s in the copied action.
3. Copy-paste like a Pro [Must read for power users]
And finally – there is another very cool feature built into “My clipboard” for all the flow-hackers reading this post, who’d like to share components of their flow offline.
You can access the “code” snippet of an action by opening Notepad and pressing CTRL+V, after you have copied it to a clipboard, then click on “My clipboard” and press CTRL+V and watch as your “code” snippet gets automatically converted to step you can use in any of your flows.
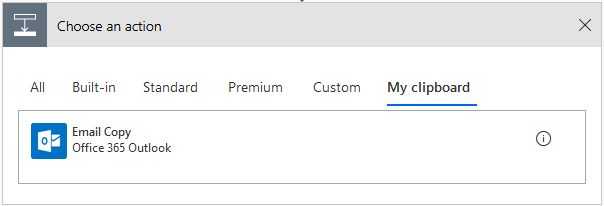
Here is a sample for you to try out. Copy the below code and navigate to “My Clipboard” and press CTRL+V
{"id":"781c2853-bd19-41f6-a9fb-10e4-ce070ecd","brandColor":"#0072c6","connectionReferences":{"shared_office365":{"connection":{"id":"/providers/Microsoft.PowerApps/apis/shared_office365/connections/shared-office365-89febf86-c72c-4424-af94-794a0cf53588"}}},"connectorDisplayName":"Office 365 Outlook","icon":"https://connectoricons-prod.azureedge.net/office365/icon_1.0.1227.1634.png","isTrigger":false,"operationName":"Email_Copy","operationDefinition":{"type":"ApiConnection","inputs":{"host":{"connection":{"name":"@json(decodeBase64(triggerOutputs().headers['X-MS-APIM-Tokens']))['$connections']['shared_office365']['connectionId']"}},"method":"post","body":{"To":"","Subject":"Test Subject","Body":"<p>Test email body</p>"},"path":"/v2/Mail","authentication":{"type":"Raw","value":"@json(decodeBase64(triggerOutputs().headers['X-MS-APIM-Tokens']))['$ConnectionKey']"}},"runAfter":{"Send_an_email_(V2)":["Succeeded"]}}}
You should see the following action show up in your clipboard
Three new user experience improvements
In addition to Clipboard support, we have also introduced a few user experience updates in the last few months, that will make it easier for you to create, manage and run your flows
1. New create experiences
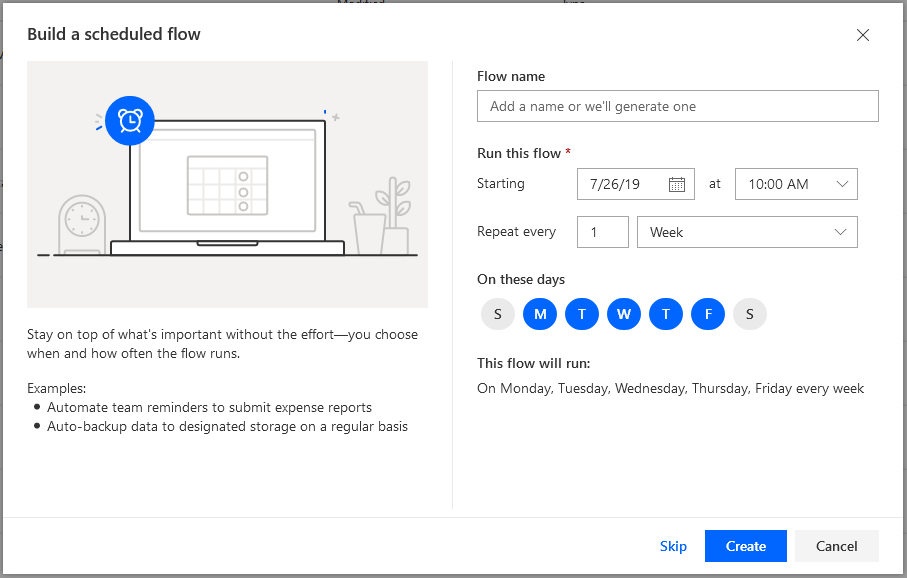
These new create experiences make it easy for you to start off your flow. You can find them under the +New option on the My flows tab.
For instance, if you want to create a Scheduled flow that runs only on weekdays – you can set it up as shown below
2. New flow details page
The new details page is cleaner and streamlined. It optimizes screen real estate, as well as provides more information on your flow. 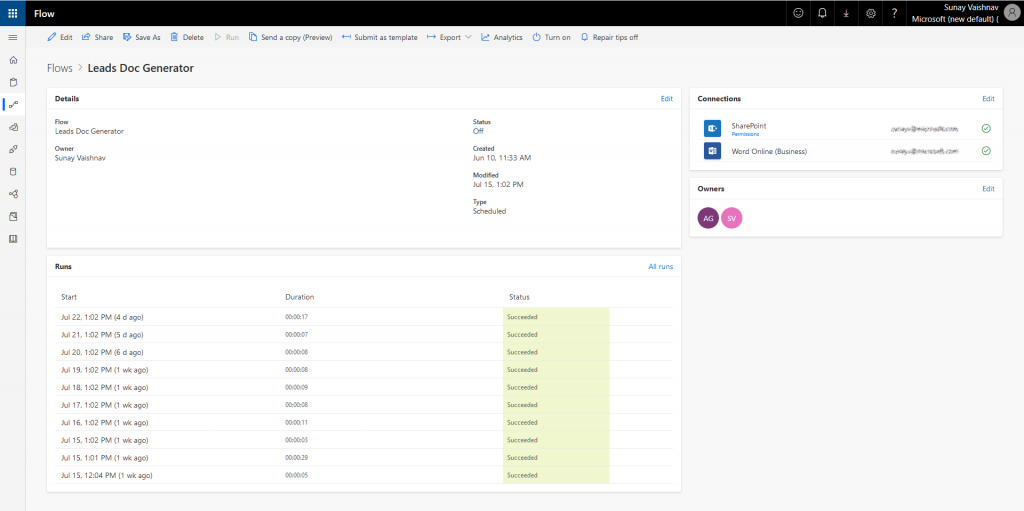
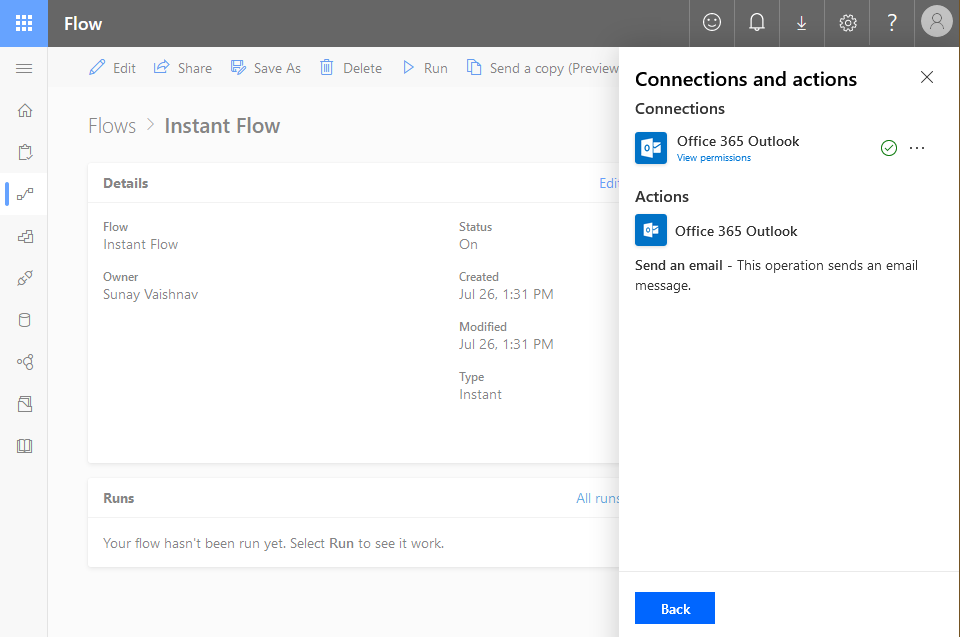
3. New run flow experience
We have also updated the run flow experience. The new “run flow” experience uses modern controls to collect inputs from users running your flow and allows you to quickly review connections and actions used in the flow for the added peace of mind.

That’s it from me for in this post. Looking forward to your feedback and comments!
